2026 Best Guide to Install Outdoor LED Lights Safely?

Time:2026-10-06 Author:Amelia
0%

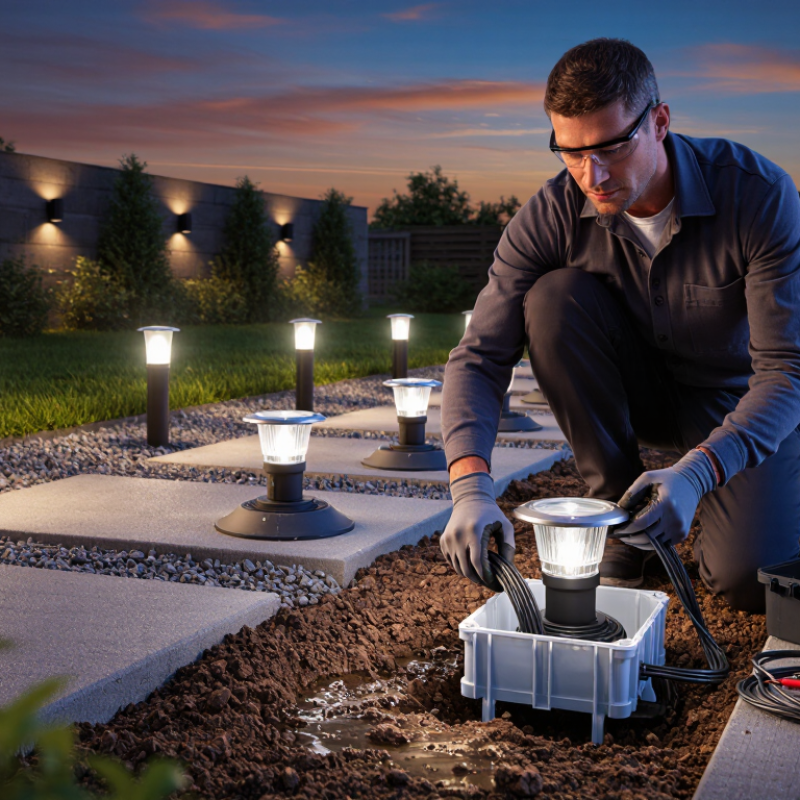
Outdoor LED lighting can transform a dark path, patio, or garden wall into a safer, more welcoming space. However, attractive results depend on careful planning, suitable equipment, and disciplined installation. This 2026 guide explains How to install outdoor LED lighting fixtures safely? It focuses on practical decisions, including fixture placement, weather protection, cable routing, grounding, and reliable testing.

A safe installation begins with the environment. Check whether each fixture has an appropriate outdoor rating, such as IP65 for exposed areas. Keep connectors above standing water and protect them inside approved weatherproof enclosures. Switch off the circuit before handling wiring. Confirm the absence of voltage with a properly rated tester. A qualified electrician should review mains-voltage connections, circuit capacity, and local electrical requirements. Manufacturer instructions must remain the final reference because LED drivers and mounting systems differ.

Small details matter. A loose cable can collect rainwater. A poorly sealed entry point can damage insulation over time. I have seen beautifully aligned lights fail because drainage was ignored. That mistake is easy to repeat. Leave space around drivers for ventilation, and avoid burying components without suitable protection. Test the lighting at night, not only during daylight. Glare may appear after installation, even when measurements seemed correct. This guide offers dependable methods, yet no checklist replaces site-specific judgment. Weather, soil movement, existing wiring, and building materials can change the safest approach. When uncertainty remains, pause the project and seek professional advice. Safety should shape the design, not follow it.
2026 Best Guide to Install Outdoor LED Lights Safely?

Assess Your Outdoor Space, Lighting Goals, and Electrical Requirements

Before installing outdoor LED lights, walk the entire space at dusk. Mark wet zones, steps, tree branches, drainage paths, and areas exposed to impact. Define the goal: pathway visibility, security, or relaxed patio lighting. Each purpose needs a different beam angle and brightness. The International Energy Agency reports that lighting uses about 15% of global electricity, so efficient planning matters. More light is not always safer.

Check the existing circuit, cable route, outlet capacity, grounding, and voltage. Outdoor receptacles should have ground-fault protection, and connections need weather-resistant enclosures. Follow the current electrical code and use products with suitable ingress protection ratings; IP65 does not mean underwater-safe. The U.S. Department of Energy states that LEDs use at least 75% less energy than incandescent lamps and can last up to 25 times longer. That still depends on heat control and correct installation.

Keep cables away from mower paths and standing water. Secure fixtures firmly, but leave access for inspection. A qualified electrician should verify difficult wiring, buried cables, and circuit loading.

My first instinct was to add brighter lights near every step. It looked impressive, yet glare reduced visibility. I would now test one small section at night before buying everything. The DOE and IEC guidance is useful, but a real property can expose problems that a checklist misses.

Choose Weather-Resistant LED Fixtures, Cables, and Safety Equipment

Outdoor LED lighting needs more than a bright fixture. It needs protection from rain, dust, temperature changes, and accidental contact. Choose fixtures with a suitable outdoor IP rating, such as IP65 or higher for exposed areas. Check the manufacturer’s installation instructions before buying cables or connectors. A sealed light can still fail when its cable joint remains exposed.

Use outdoor-rated, double-insulated cables with enough length for clean routing. Keep connections inside weatherproof junction boxes, and place them above standing water. Bury cables at the depth required by local electrical codes. Never pull a cable tightly around a sharp corner. It may look neat today, but sunlight and movement can damage the insulation later.

I have seen small mistakes create large risks. One loose connector caused flickering after a week of heavy rain. Turn off the power before testing or adjusting any connection. A qualified electrician should handle mains-voltage work, especially near pools or wet ground. Use a residual-current safety device where local rules require one. Wear insulated gloves, eye protection, and stable footwear during installation. Test the circuit with an approved tester, not a quick touch. That shortcut is dangerous. Leave room for drainage, inspect seals each season, and replace cracked housings immediately. There is no perfect installation; weather eventually exposes weak details.

2026 Best Guide to Install Outdoor LED Lights Safely? - Choose Weather-Resistant LED Fixtures, Cables, and Safety Equipment

Safety Dimension Recommended Specification Where It Applies Why It Matters Installation Check
Outdoor Fixture Ingress Protection IP65 minimum for exposed areas
Use IP66 where powerful water jets or severe weather exposure is expected. Use IP67 only when temporary immersion is possible and the complete product is approved for that use.
Exterior walls, patios, walkways, gardens, decks, and other locations exposed to rain or hose spray. The first IP digit concerns protection from solids and dust; the second concerns water protection. A higher rating does not automatically make a fixture suitable for every installation. Confirm the complete fixture assembly, including connectors and cable entries, has the required rating. Keep drain holes and seals unobstructed.
Wet-Location Approval Use fixtures marked for wet locations
Damp-location approval is not sufficient where rain, snow, or direct water contact can occur.
Uncovered outdoor areas and any location directly exposed to precipitation. Wet-location products are designed to prevent water from reaching energized parts under specified conditions. Read the product marking and installation instructions. Do not rely on IP information alone when the applicable electrical code requires a wet-location listing.
Low-Voltage System Choice Prefer listed 12 V or 24 V DC systems for landscape lighting
Use a compatible, outdoor-rated driver or transformer with adequate capacity.
Garden lights, pathway lights, accent lighting, steps, and other landscape applications. Lower voltage reduces shock risk compared with line-voltage wiring, but it does not remove the need for proper insulation, overcurrent protection, and weatherproof connections. Match the driver output voltage to the fixture voltage. Add the connected wattage and keep the driver within its marked maximum load.
Driver or Transformer Capacity Allow at least 20% spare capacity
Example: a 100 W load should use a driver rated for at least 125 W.
All constant-voltage LED systems and low-voltage outdoor lighting circuits. Headroom helps reduce overheating, nuisance shutdowns, and premature driver failure. Verify output voltage, output current, enclosure rating, ventilation requirements, and compatibility with dimming or control equipment.
Outdoor Cable Selection Use cable listed for the location and voltage
For direct burial, use cable specifically marked for direct burial. For wet areas, use conductors and jackets approved for wet locations.
Buried landscape wiring, conduit, exterior junctions, and exposed low-voltage runs. Ordinary indoor cable can absorb moisture, lose insulation performance, and deteriorate when exposed to sunlight, soil, or temperature changes. Check conductor size, temperature rating, sunlight resistance, burial suitability, and local electrical-code requirements before installation.
Voltage-Drop Control Keep voltage drop at or below 3% where practical
Use a larger conductor, shorter run, lower load, or distributed power feed when necessary.
Long cable runs and installations with multiple LED fixtures connected in series along one circuit. Excessive voltage drop can cause dimming, color inconsistency, flicker, driver stress, and unreliable operation. Calculate the one-way distance, total current, conductor resistance, and circuit voltage. Test the voltage at the farthest fixture under load.
Ground-Fault Protection Use GFCI protection where required
Outdoor receptacles and many outdoor circuits require ground-fault protection under local electrical codes.
Line-voltage outdoor receptacles, wet locations, exterior equipment, and circuits specified by the applicable code. A GFCI can disconnect power quickly when it detects an imbalance that may indicate current flowing through an unintended path. Test the GFCI using its test and reset controls before use and at the interval recommended by the manufacturer or local authority.
Overcurrent Protection Use the breaker or fuse specified for the conductor and equipment
Never install a larger protective device to stop nuisance tripping without identifying the cause.
Every branch circuit, low-voltage driver output, and separately protected lighting circuit. Overcurrent protection limits damage caused by overloads, short circuits, and conductor faults. Confirm the protective-device rating does not exceed the allowable ampacity of the conductors and equipment.
Buried Cable Protection Follow the locally required burial depth
Depth varies with voltage, wiring method, physical protection, and jurisdiction. Use conduit where required or where extra protection is needed.
Garden beds, lawns, paths, driveways, and areas subject to digging or vehicle traffic. Proper burial and mechanical protection reduce the risk of damage from shovels, edging tools, roots, vehicles, and soil movement. Contact the local utility-locating service before digging. Mark the route and avoid placing cable directly beneath likely digging areas when possible.
Cable Connections Use outdoor-rated, sealed connectors
Choose connectors compatible with the cable type, conductor size, voltage, and wet-location requirements.
Fixture tails, junction boxes, branch connections, and buried or exposed splices. Loose or unsealed connections are common points of water entry, corrosion, resistance heating, and intermittent operation. Make connections in accordance with the instructions. Keep splice points accessible unless the connector is specifically approved for burial.
Junction Boxes and Enclosures Use weatherproof enclosures with compatible glands or hubs
Use an enclosure rated for the location and maintain its cover, gasket, and cable-entry integrity.
Exterior junctions, drivers, control modules, and line-voltage splices. A suitable enclosure protects electrical connections from moisture, impact, dirt, and accidental contact. Install entries downward or as instructed, tighten cable glands correctly, and prevent water from pooling around the enclosure.
Mounting and Mechanical Support Secure fixtures to stable surfaces
Use corrosion-resistant fasteners suitable for the mounting material and environment.
Walls, posts, fences, decks, stairs, soffits, and landscape structures. Secure mounting prevents falling fixtures, damaged cables, vibration-related failures, and misdirected light. Do not suspend fixtures by their electrical cable. Leave service loops where permitted and keep cables away from sharp edges and hot surfaces.
Heat Management Maintain the specified clearance and ventilation
Do not cover heat sinks, vents, drivers, or fixtures with insulation unless the product is designed for that installation.
Recessed exterior lights, enclosed fixtures, drivers, and high-output LED luminaires. LEDs and drivers produce heat. Excessive temperature can shorten service life, reduce output, and damage insulation or components. Install on suitable surfaces, follow the thermal instructions, and keep combustible materials away from hot components.
Surge and Lightning Considerations Use surge protection where the risk or code requires it
Consider protection for long exterior runs, exposed structures, and installations in areas with frequent storms.
Outdoor line-voltage circuits, long cable routes, tall structures, and sensitive control systems. Surges can damage drivers, controls, and LED modules even when the lighting load is relatively small. Use a properly rated surge protective device and ensure the system grounding and bonding are correct.
Light Placement and Glare Aim light away from drivers, roads, windows, and neighboring properties
Use shielding, lower output, or lower color temperature when appropriate.
Pathways, driveways, entrances, gardens, steps, and security lighting. Correct aiming improves visibility and reduces glare, eyestrain, light trespass, and hazards caused by excessive contrast. Check the installation after dark from pedestrian and driver viewpoints. Keep stairs and changes in level evenly illuminated.
Color Temperature About 2,700–3,000 K for comfortable residential outdoor lighting
Higher color temperatures may provide a cooler appearance but can create more glare in some settings.
Residential pathways, patios, entrances, and landscape accent lighting. Color temperature affects visual comfort, appearance, and the perceived harshness of outdoor light. Select based on the task, surrounding environment, local light-pollution rules, and the manufacturer’s photometric data.
Personal Protective Equipment Use insulated tools, eye protection, gloves, and suitable footwear
Use a hard hat or hearing protection when the work environment requires it.
Installation, drilling, trenching, cable termination, and work near existing electrical systems. Personal protective equipment reduces injury risk from electric shock, sharp materials, flying debris, slips, and contact with tools. Inspect tools and PPE before use. PPE does not replace de-energizing, testing, guarding, and following safe work procedures.
De-Energizing and Testing Turn power off, lock out where applicable, and verify absence of voltage
Use an adequately rated tester and test it before and after checking the circuit.
All line-voltage work and any low-voltage system connected to an energized driver. Switches may not disconnect every energized conductor, and unexpected backfeed can create a shock hazard. Identify the correct circuit, isolate all energy sources, verify the tester, test the circuit, and restore power only after the work area is clear.
Final Inspection and Maintenance Inspect at least seasonally and after severe weather
Replace cracked lenses, damaged cable jackets, corroded connectors, and failed seals.
All exterior LED lighting systems. Weather, soil movement, animals, landscaping work, and vibration can degrade an installation over time. Check mounting, cable exposure, water entry, GFCI operation, fixture temperature, flicker, and correct aiming. De-energize before opening equipment.
Code and Permit Compliance Follow the current local electrical code
Use a qualified electrician for line-voltage wiring, service-panel work, permits, or inspections when required.
Every installation, especially circuits connected to the building supply. Electrical requirements differ by location and can change according to voltage, wiring method, occupancy, and site conditions. Check requirements with the local authority having jurisdiction before purchasing materials or digging. Keep installation instructions and inspection records.

Safety note: Product ratings, burial depths, conductor sizes, GFCI requirements, and permit rules vary by location and installation method. Always follow the applicable electrical code, product instructions, and requirements of the local authority having jurisdiction.

Plan Fixture Locations, Cable Routes, and Power Connections

Plan every fixture location before digging or pulling cable. Mark paths with small stakes, then check how light falls after sunset. Place fittings beside steps, gates, and uneven paving, not directly into eye level. Keep dark zones between fixtures to avoid a harsh, overlit appearance. Keep it simple.

Draw the cable route on paper. Avoid tree roots, drainage channels, sprinkler lines, and areas where future digging is likely. Use outdoor-rated cable, conduit, and junction boxes designed for wet conditions. Follow local requirements for burial depth and mechanical protection. Leave a small service loop near each fitting, but do not coil excess cable tightly. Water can collect in low points, so plan gentle routes and sealed connections. My first layout would probably include too many lights; reviewing it from the property edge can reveal unnecessary glare and wasted energy.

Calculate the total wattage, starting current, cable length, and expected voltage drop before choosing the power supply. Keep connections above standing water and inside accessible, weather-resistant enclosures. Outdoor circuits should use appropriate ground-fault protection, such as a GFCI or local equivalent. A qualified electrician should verify the circuit, grounding, isolation method, and final connections. Never rely on a household indoor extension lead as a permanent outdoor solution. Test each zone at night, during rain if conditions are safe, and after the ground settles. Small mistakes become expensive.

Install Outdoor LED Lights with Proper Grounding and Sealing

2026 Best Guide to Install Outdoor LED Lights Safely

Outdoor LED lighting needs more than a suitable fixture and a nearby outlet. Grounding and sealing protect people, wiring, and the light itself. Before work begins, switch off the circuit and confirm it is dead with a voltage tester. Power off first. If the wiring is unfamiliar, ask a licensed electrician to inspect it.

Connect the grounding conductor to the fixture’s grounding terminal and the metal junction box. Tighten each connection firmly, then protect it inside a weather-rated enclosure. Never rely on a mounting screw for grounding. A properly installed GFCI or RCD can reduce shock risks in damp areas, but it cannot replace correct wiring. Follow local electrical requirements and the fixture’s installation instructions.

Sealing begins where cables enter the fixture, box, or wall. Use an outdoor-rated cable gland, gasket, or compression fitting that matches the cable diameter. Water finds gaps. Keep connections above standing water, and create a gentle drip loop so rain runs away from the enclosure. Do not block designed drainage holes with sealant. My first outdoor installation used too much silicone and trapped moisture inside the housing; that mistake taught me to seal entry points, not every opening. Inspect the fixture after heavy rain, looking for condensation, loose covers, or brittle seals. Replace damaged parts before energizing the circuit.

2026 Best Guide to Install Outdoor LED Lights Safely

Choose an outdoor LED fixture with an ingress protection rating suitable for its exposure. Under IEC 60529, the second IP digit indicates protection against water, from water splashes to continuous immersion. Always follow local electrical codes, connect exposed metal parts to protective earth, and seal cable entries against moisture.

Installation reminder: Use weather-resistant junction boxes and cable glands, keep connections above standing-water level, verify grounding continuity, and isolate power before installation or maintenance.

Test the System and Schedule Ongoing Maintenance and Inspections

After installation, test the entire outdoor LED system at night. Check every fixture, connector, timer, sensor, and cable route. Confirm that light reaches walkways without shining into windows or creating dark gaps. A residual-current device should trip during a controlled test, but only qualified personnel should perform electrical work. Follow local electrical codes and the manufacturer’s installation instructions.

Use a temporary manual override before programming the schedule. It exposes faults that daylight can hide. Set photocells to respond to actual darkness, then adjust timers for seasonal changes. The U.S. Department of Energy reports that LED lighting can use up to 75% less energy and last up to 25 times longer than incandescent lighting. That advantage still depends on proper heat control, clean lenses, and stable connections.

Inspect the system monthly during its first season. Look for flickering, water inside housings, loose anchors, corrosion, and damaged insulation. Record voltage readings, switching times, and failed components. The Illuminating Engineering Society’s LM-80 and TM-21 methods emphasize measured lumen maintenance, yet field conditions are less predictable. I have seen “weatherproof” fittings fail after poor sealing. Labels alone are not proof. Clean lenses every three to six months, trim nearby vegetation, and retest protection devices after severe storms. Keep the log. Small defects rarely remain small.

FAQS

Where should outdoor light fixtures be placed?

Place them beside steps, gates, and uneven paving. Avoid direct eye-level glare. Leave some darker gaps between fixtures.

How should cable routes be planned?

Mark routes with small stakes before digging. Avoid roots, drainage channels, sprinkler lines, and likely future digging areas. Draw the route on paper.

What materials are suitable for outdoor cable connections?

Use outdoor-rated cable, conduit, and sealed junction boxes. Keep connections above standing water. Leave a small service loop near each fixture.

How can voltage and power requirements be checked?

Calculate total wattage, starting current, cable length, and expected voltage drop. Select a suitable power supply afterward. Guessing can become expensive.

What electrical protection is needed outdoors?

Use appropriate ground-fault protection, such as a local equivalent to a GFCI. A qualified electrician should verify grounding and final connections.

How should the system be tested after installation?

Test every fixture, connector, timer, sensor, and cable route at night. Check walkways, windows, dark gaps, and switching behavior. Daylight hides faults.

How should timers and sensors be adjusted?

Use a temporary manual override before programming schedules. Set photocells for actual darkness. Recheck timers when seasonal daylight changes.

How often should outdoor lighting be inspected?

Inspect the system monthly during its first season. Look for flickering, water inside housings, corrosion, loose anchors, and damaged insulation.

How can outdoor fixtures remain efficient and reliable?

Clean lenses every three to six months. Trim nearby vegetation and check heat control. LED systems may use much less energy, but poor sealing can ruin performance.

What records should be kept during maintenance?

Record voltage readings, switching times, failed components, and storm-related checks. Labels are not proof of weather resistance. I might overlook small defects without a log.

Conclusion

This guide explains how to install outdoor LED lighting safely by beginning with a careful assessment of your outdoor space, lighting objectives, and available electrical capacity. It covers how to identify suitable fixture positions, select weather-resistant LED lights and cables, and prepare essential safety equipment. Proper planning helps ensure that cable routes remain protected, power connections are practical, and the lighting design provides balanced coverage without creating unnecessary hazards.

The installation process focuses on secure mounting, correct grounding, and effective sealing against moisture, dust, and changing weather conditions. After installation, every connection should be tested for reliable operation, stable brightness, and safe performance. The guide also emphasizes regular inspections and maintenance, including checking for damaged cables, loose fixtures, water entry, or reduced light output. Following these steps can help create an efficient, durable, and safer outdoor lighting system.

Amelia

Amelia

Amelia is a seasoned marketing professional with a wealth of expertise in our company’s core offerings. With an unwavering passion for driving growth and innovation, she plays a pivotal role in shaping our marketing strategies and enhancing brand visibility. A key aspect of her responsibilities......